Introduction
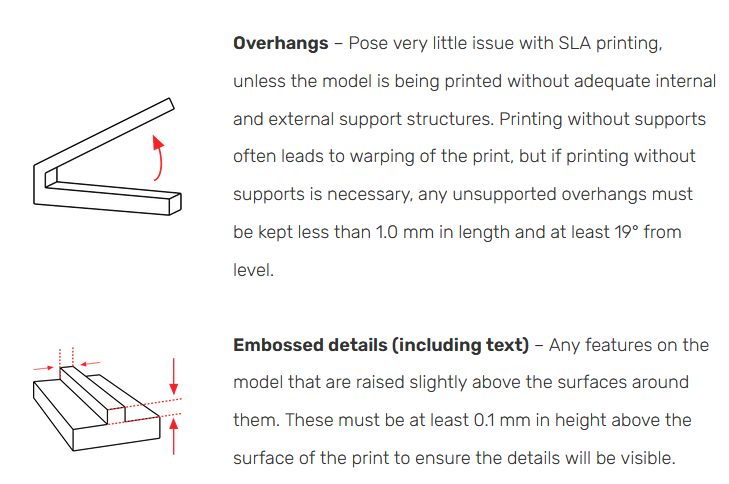
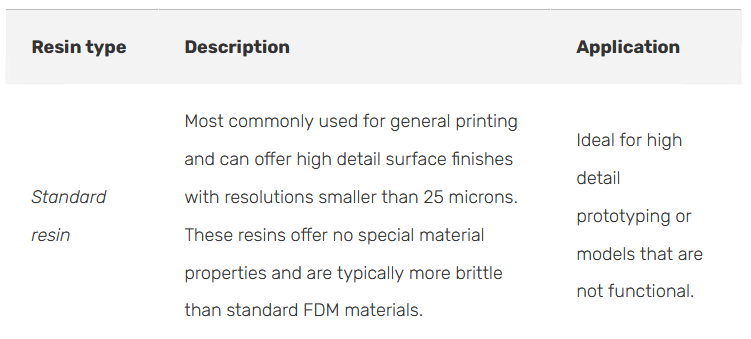
Stereolithography (SLA) is a 3D printing process that uses a laser to cure photopolymer resin layer by layer. SLA is best suited for producing small, smooth parts with fine details to a high level of accuracy.
This article outlines the SLA printing process, presents the limitations and advantages of designing components to be printed with SLA and discuss the most common SLA materials.
Printing with SLA
Print Process
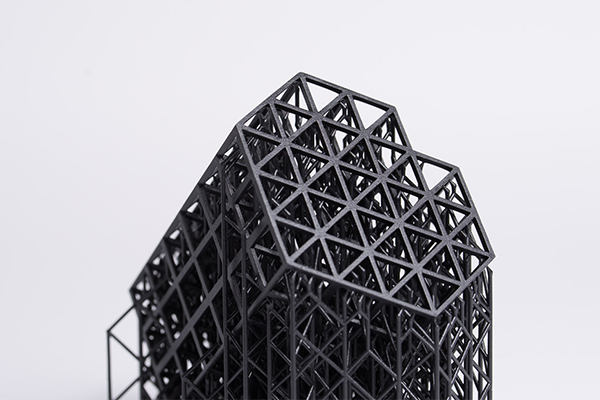
A typical desktop SLA machine will contain a UV laser to cure a specific layer of a component from a tank of photosensitive resin. The bottom of the tank is transparent and the UV laser is precisely controlled to trace a 2D contour of the object. The laser hardens (cures) the resin forming a solid layer.
A very thin slice of the object is created with each pass of the laser. This thin slice is stuck to the layer before it (or the build plate) and the bottom of the tank. The newly printed layer is then separated from from the bottom of the tank (depending on the machine this can involve peeling, sliding or shaking the tank), the build plate then moves away 1 layer thickness and the process is repeated again until the part is completed.
For an SLA print to be successful, reducing the forces on the newly printed layers during the separation stage is critical. The separation stage creates areas of high stress along a potentially razor thin edge which can lead to a high part failure rate and warping (the part can stick to the tank bottom rather than the build plate).
Print orientation
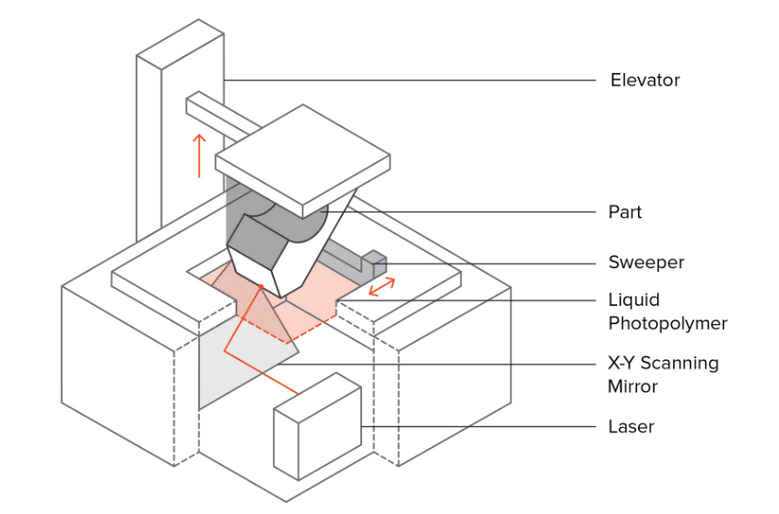
When orienting a part for SLA, the biggest concern is Z-axis cross-sectional area. The forces involved with a print sticking to the tank are directly proportional to the 2D cross-sectional area of the print. Because of this, the part is printed at an angle to the plate, and reduction of support is not a primary concern (as shown in the images below). Minimizing the cross-sectional area along the z-axis is the best way to orient parts for SLA prints.
Model orientated sub-optimally horizontally with large z-axis cross-sectional area. In this orientation, support is minimized but the likelihood of a print failure is high. Print volume = 33.39 mL, print time = 2 hr 27 min
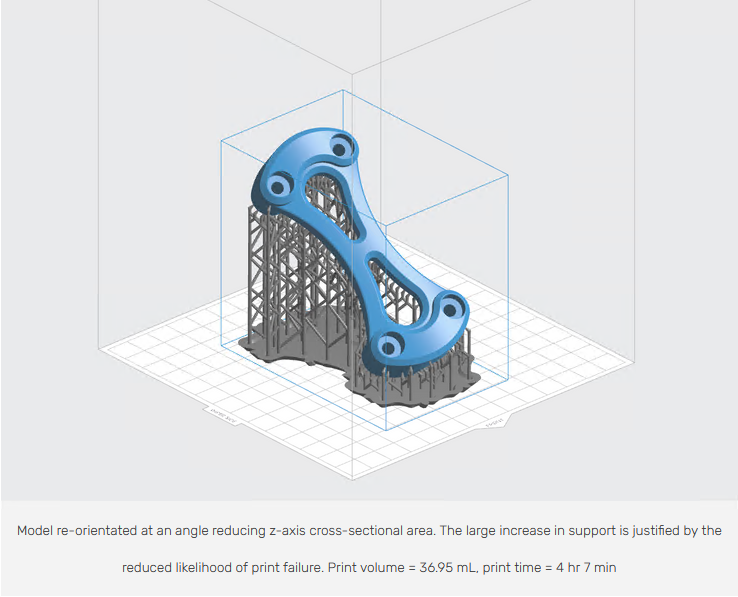
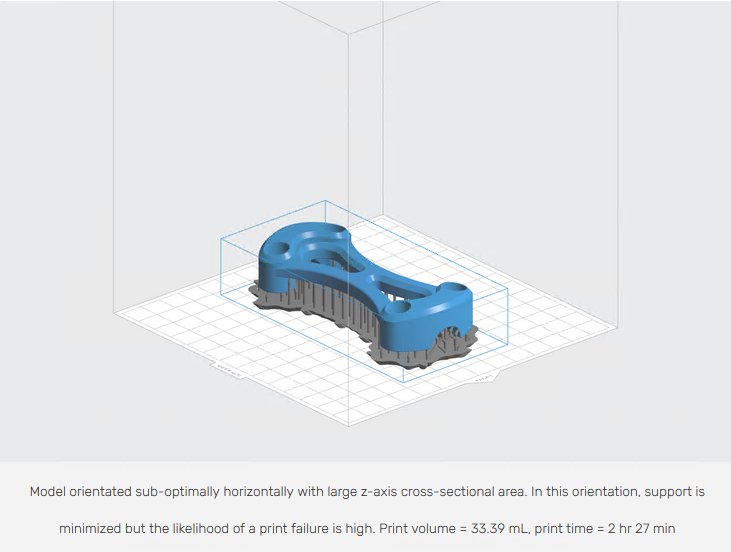
Model re-orientated at an angle reducing z-axis cross-sectional area. The large increase in support is justified by the reduced likelihood of print failure. Print volume = 36.95 mL, print time = 4 hr 7 min
As a designer, it is important to understand why part orientation impacts the quality of an SLA print. The necessity to orientate components so that the z-axis cross-sectional area is reduced often results in a significant amount of support needing to be added to the model. In some instances, a design may need so much support that printing in SLA is no longer cost-effective or so detrimental to the appearance of the part (once support has been removed) that the end result is not visually satisfactory. Limiting the number of horizontal members, hollowing out components and reducing the cross-sectional area are all steps a designer can take to optimize a design for SLA.
Isotropy
SLA prints are isotropic because the layers chemically bond to one another as they print, resulting in near-identical physical properties in the x, y, and z-direction. Whether the part is printed parallel or perpendicular to the build plate, the final material properties of the part will not be noticeably impacted.
Designing for SLA printing
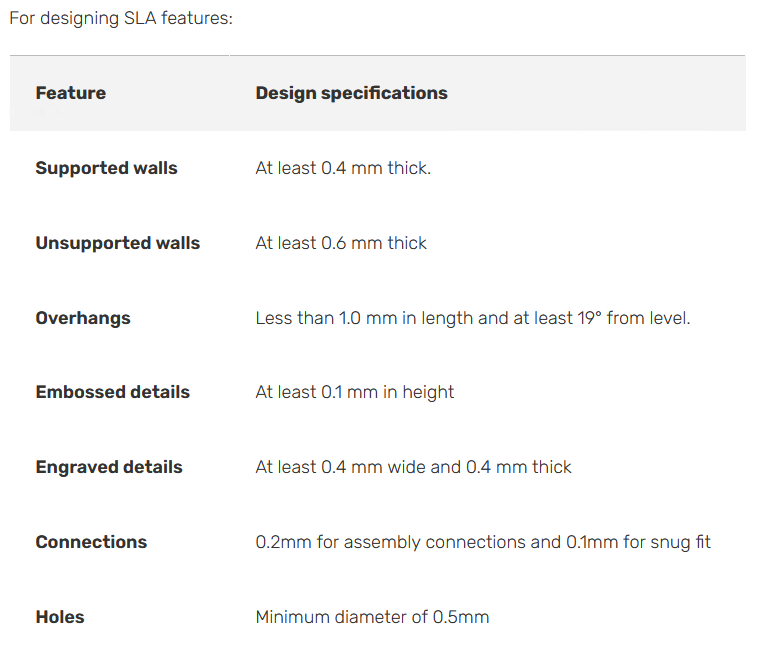
Print features
The level of detail an SLA printer can produce is dependent on the laser spot size and resin properties. General guidelines for designing for SLA are as follows:
Resolution
SLA is able to achieve much higher resolutions than FDM because it uses a laser to solidify the material. SLA printing resolution in the XY-direction (or horizontal resolution) is dependent upon the laser spot size and can range anywhere from 30 to 140 microns. This is not an adjustable parameter of printing. The minimum feature size cannot be smaller than the laser spot size.
Resolution in the Z-direction (or vertical resolution) varies from 25 to 200 microns. Choosing vertical resolution is a trade-off between speed and quality. For a part that has few curves or fine details, there will be little visual difference between a print at 25 microns versus a print at 100 microns. By comparison, a desktop FDM machine will typically print z-axis layers at 150 to 400 microns.
Hollowing and cupping
SLA machines print a solid, dense model but if the print is not intended to be a functional part hollowing the model significantly reduces the amount of material needed as well as print time. It is recommended that the walls of the hollowed print be at least 2 mm thick to reduce the risk of failure during printing.
If printing a hollow part, drainage holes must be added to prevent uncured resin from getting trapped inside the final print. This uncured resin creates pressure imbalances within the hollow chamber, and will cause what is known as “cupping”. Small failures (cracks/holes) propagate throughout the part and will cause complete failure, or part explosion, if not corrected. Drain holes should be at least 3.5 mm in diameter, and at least one hole must be included per hollow section.
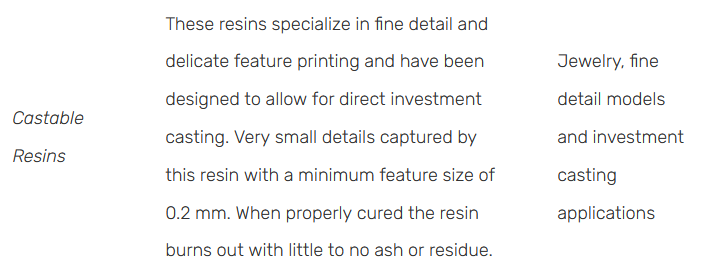
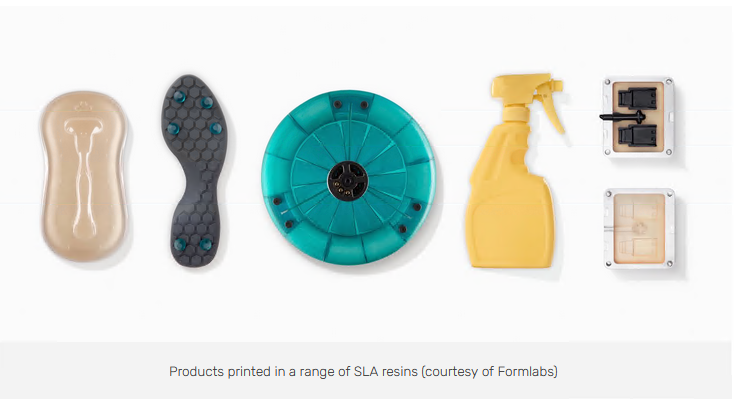
SLA materials
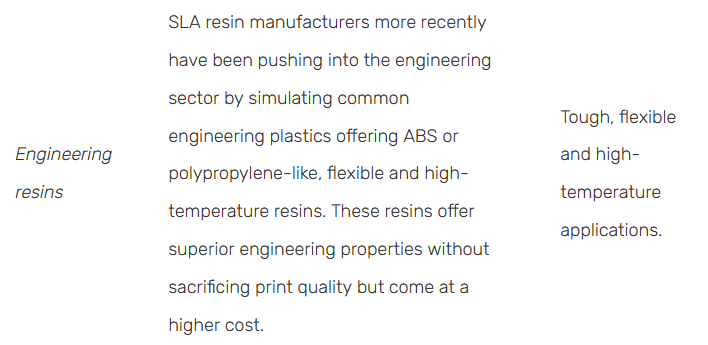
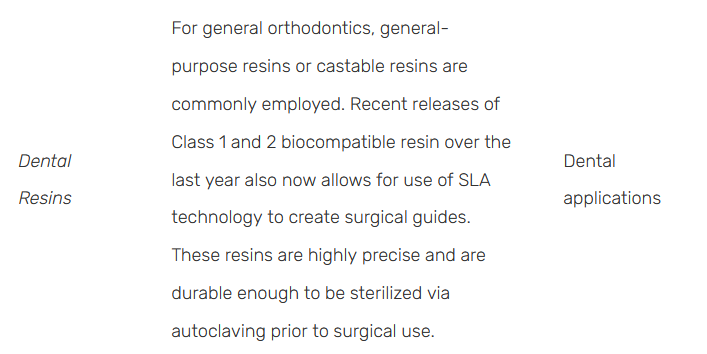
The table below identifies some of the more common SLA resins.
Post-processing
There are a range of surface finishes that can be achieved on SLA printed parts. The desired surface finish is often governed by cost and application. For a detailed guide on the most common SLA surface finishes refer to this article.
Limitations
Print volume
SLA printers generally have a much smaller build volume than most FDM printers, with the exception of commercial machines. The Formlabs Form 2 (a common desktop SLA printer) has a build volume of 145mm × 145mm × 175mm while the Ultimaker 2+ (a common FDM desktop printer) offers 223mm × 223mm × 205mm. When SLA print geometries exceed the printer capacity they can be printed in smaller sections and then assembled. The best method for bonding SLA printed components together is a 5-30 minute epoxy.
Cost vs FDM
The cost by volume of SLA resin compared to the filament used for FDM printing is higher. Because of this SLA prints are usually more expensive however the ability for SLA to print intricate details means it is a competitive option when compared to many of the more industrial 3D printing technologies. A liter of standard SLA resin typically costs around USD$150 while a 1kg roll of ABS filament for FDM will cost around USD$25.
Material properties
SLA parts are generally not suited for producing functional parts that are subjected to loads. The nature of SLA resins means that parts are brittle, not as stable as other 3D printed materials over long periods of time and do experience some creep. Most SLA printed parts require curing in a UV chamber post-print. Post-curing enables parts to reach the highest possible strength and become more stable.
Rules of thumb
- SLA is ideal for small parts that require a smooth surface finish (comparable to injection molding) and a high level of accuracy.
- Support structures are critical to successfully printing accurate SLA parts. If a good finish is required on a surface the part should be orientated so that that surface is not in contact with support material (typically upwards facing).
- SLA parts typically have poor mechanical properties and are best suited for non-functional prototyping, enclosures and visual models.